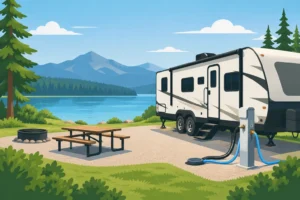
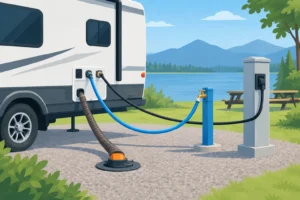
You have backed onto your site, leveled the RV, and are ready to settle in. Knowing how to use RV hookups turns those first few minutes into an easy routine instead of a stressful tangle of hoses, cords, and questions. With the right setup, your site becomes a comfortable home base for one night, a work assignment, or a longer stay in Tulsa.
Start With a Quick Site Check
Before connecting anything, take a slow walk around your RV site. Find the electrical pedestal, fresh-water spigot, and sewer inlet. Check that your hoses and power cord can reach without being stretched tight, driven over, or creating a tripping hazard.
If you have just arrived, get the RV parked, leveled, and stabilized first. A level RV helps your refrigerator operate properly and makes everyday life inside much more comfortable. Once the wheels are chocked and the rig is secure, you can begin connecting utilities.
It also helps to inspect your equipment before every stay. Look for cracked hose fittings, worn electrical plugs, loose sewer connections, or damaged gaskets. Replacing a small part before setup is much easier than handling a leak after dark.
How to Use RV Hookups in the Right Order
There is no single setup order that works for every traveler, but a careful routine keeps the process simple. Many experienced RV guests connect electric first, then fresh water, and sewer last. That gives you light and power while you finish setting up, while keeping the sewer hose out of the way until it is needed.
Connect the electrical hookup safely
At a full-service RV site, the power pedestal may offer 20-, 30-, and 50-amp outlets. Your RV should use the outlet that matches its electrical service. A 30-amp RV uses a 30-amp outlet, while a larger 50-amp coach uses the 50-amp outlet. The 20-amp outlet is usually a standard household-style connection and is best for limited use.
Start by making sure the breaker on the pedestal is switched off. Plug your RV shore-power cord firmly into the correct outlet, then turn the breaker on. If you use an adapter, make sure it is rated for RV use and understand that an adapter does not increase the amount of power available. A 50-amp RV connected to a 30-amp service must use less electricity to avoid tripping the breaker.
After connecting, check your RV’s monitor panel or surge protector to confirm that power is coming in correctly. A quality RV surge protector can help alert you to wiring issues or unsafe voltage before they affect your appliances. If a breaker trips repeatedly, do not keep resetting it. Turn off high-demand appliances, such as the air conditioner, microwave, or electric water heater, and ask park management for assistance if the issue continues.
At Big Tree RV Park, sites offer 50/30/20 AMP electric service, giving travelers and extended-stay guests options for a wide range of rigs.
Connect fresh water with clean equipment
Your fresh-water connection supplies water to the RV sink, shower, toilet, and water heater. Use a drinking-water-safe hose only. A regular garden hose can affect water taste and may not be designed for potable water.
Attach a water-pressure regulator to the campground spigot before connecting the hose. Water pressure can vary from site to site, and a regulator helps protect your RV plumbing from pressure that is too high. Add an inline water filter if you prefer extra filtration for taste and sediment.
With the spigot still off, connect the hose to the regulator and then to your RV’s city-water inlet. Make sure the hose washer is in place so the fitting seals properly. Turn the water on slowly and check both ends for leaks. Inside the RV, open a faucet for a moment to release air from the lines.
Keep your fresh-water hose clean and separate from sewer equipment. Never let the end of the hose rest on the ground or touch the sewer connection. When it is time to leave, drain the hose, cap the ends if possible, and store it in its own container.
Set up the sewer connection carefully
The sewer hookup is usually the part that makes new RV owners nervous, but it is straightforward with a secure connection and a few basic habits. Wear disposable gloves, keep hand sanitizer nearby, and use a dedicated sewer hose that is never used for fresh water.
Connect one end of the sewer hose to the RV’s waste outlet. Use a locking fitting if your hose has one, then attach the other end to the site’s sewer inlet with a threaded adapter or sewer elbow. The elbow should fit snugly into the inlet to prevent odors and splashes. If your site provides a sewer cap, keep it nearby for departure.
For most RVs, leave both the black-tank and gray-tank valves closed between dumps. Your black tank needs enough liquid to move waste through the hose effectively. Leaving the black valve open all the time can allow liquids to drain away while solids remain behind, creating a difficult buildup.
When your black tank is about two-thirds full, open the black-tank valve and let it drain completely. Close it, then open the gray-tank valve. The soapy gray water helps rinse the hose after the black tank has emptied. If you are staying longer, repeat this process as needed rather than dumping small amounts every day.
Manage Your Power Use at the Pedestal
The biggest difference between a relaxed RV stay and a frustrating one is often power management. A 30-amp connection provides less available power than a 50-amp connection, so you may need to choose which large appliances run at the same time.
On 30-amp service, running the air conditioner, microwave, electric water heater, hair dryer, and coffee maker together can overload the circuit. If the weather is warm, run the air conditioner first, then use high-draw appliances one at a time. Switching the water heater to propane, if your RV has that option, can also reduce electrical demand.
A 50-amp RV has more capacity, but it still deserves care. Check cords periodically for heat, keep pedestal doors closed, and do not use damaged extension cords. If a plug feels hot or looks discolored, disconnect power safely and report the issue right away.
Keep Your Hookup Area Clean and Organized
A well-kept site is safer and more pleasant for everyone. Route hoses and cords neatly along the side of the RV where possible, rather than across the patio area or driveway. Use hose supports for longer stays if allowed, especially when you need consistent drainage to the sewer inlet.
Store extra gear when you are not using it. A tidy setup gives you more room to enjoy your outdoor space, whether that means a quiet morning coffee, a meal at the picnic table, or time outside with your dog.
For families and long-term guests, an organized utility area also makes it easier to spot a problem early. A small puddle, a slow drip, or an unusual smell is easier to address when equipment is accessible and the site is not cluttered.
Disconnect Without the Mess
When departure day arrives, begin by preparing the inside of your RV. Turn off appliances, secure loose items, and make sure tank valves are closed. Dump and rinse tanks before disconnecting the sewer hose, then replace caps securely.
Turn off the water at the spigot, relieve pressure by opening a faucet inside, and disconnect your fresh-water hose. Drain it fully before storing it. Next, switch off the pedestal breaker, unplug the shore-power cord, and store the cord dry and clean.
Take one final walk around the site. Look under the RV, check the pedestal area, and confirm that you have packed wheel chocks, mats, hoses, and adapters. Leaving a site clean is a simple courtesy that helps the next guest start their stay on the right foot.
RV hookups are not complicated once you have a dependable routine. Take your time, protect your equipment, and ask for help when something does not look right. Then you can relax, recharge, and enjoy the comfort of a site that feels ready for you.